|
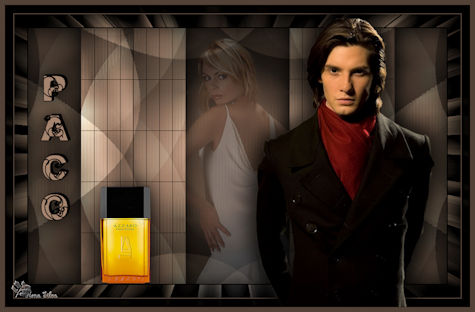
**PACO**
TUTORIAL DE ANIMABELLE _TRADUÇÃO EM PORTUGUÊS
EDITH SPIGAI
"Obrigado
Animabelle por permitir traduzir seus tutoriais em
Português"
MATERIAL
-Unlimited 2.0 / &<Bkg Kaleidoscope>
-Unlimited 2.0 / &<Bkg Designer sf10 I>
-Tramages
-Graphics Plus
-VanDerLee
-Alf's Power Toys
-FM Tile Tools
-VM Natural
-AAA Frame
-Alien Skin Eye Candy 5: Impact
Cores:
Cor-1 #a5856f
Cor-2 #000000
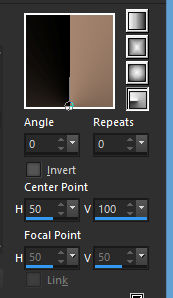
1- Abir uma imagem de 900 x 550 px. preencher com o
gradiente.
2- Plugin > Unlimited 2.0 > &Bkg Kaleidoscope > Mirrored
& Scaled
3- Layers > Duplicate
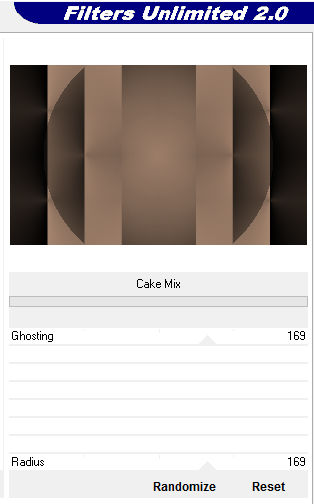
4- Plugin > Unlimited 2.0 > &Bkg Kaleidoscope > Cake Mix
> 169/169
5- Effects > Image Effects > Seamless Tiling
6- Layers > Duplicate - Image > Mirror Vertical (Flip)
7- Layers > Opacity > 50% > Layers > Merge Visible
8- Layers > Duplicate
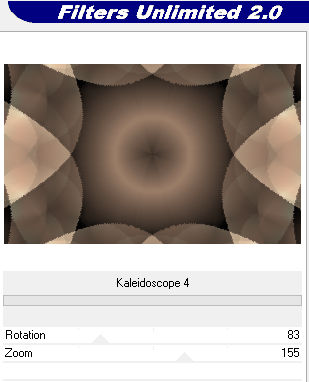
9- Plugin
> Unlimited 2.0 > &Bkg Kaleidoscope >
Kaleidoscope 4 83 / 155
layer's
opacity : 40%
layers -> duplicate
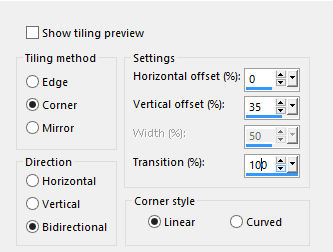
10- Plugin > Tramages > Tow The Line > Default >
80/54/48/9
11- Plugin > Unlimited 2.0 > Bkg Designers sf10 I >
Barcode Generator > Default
181/228/159/133/193/182
12- Layers > Blend Mode: Multiply - Opacity > 20%
13- Layers > Merge Visible
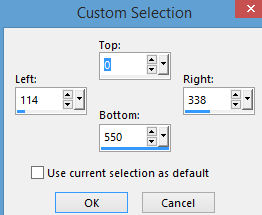
14- Ativar a ferramenta selection tool > custom
selection
Selection > promote selection to layer
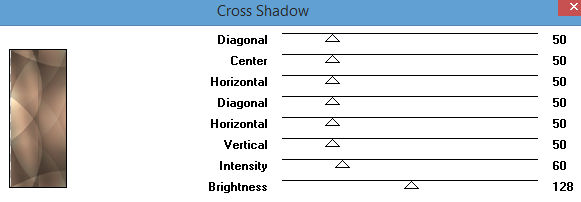
15- Plugin > Graphic Plus > Cross Shadow >
50/50/50/50/50/50/60/128
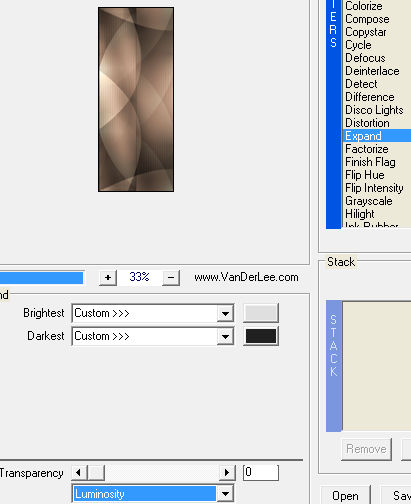
16- Plugin
VanDerLee > Unplugged X > Expand > Luminosity
17- Plugin > Alf's Power Toy > Color Grid
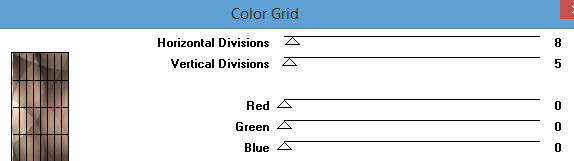
Selection >
None
18- Layers > Duplicate
19- Image > Mirror Horizontal (mirror)
Image > Mirror Vertical (flip)
layers > Merge
Down
20- Layers > Opacity > 80%
21- Effects > 3D Effects > Drop Shadow > 0/0/90/60 -
preto
22- Ative a Layer Merged > Copy/Paste as new layer
"77_femme_page6_Animabelle"
Posicione no centro da Tag como resultado final.
23- Layers > Opacity > 50%
24- Adjust > Sharpness > High pass sharpen

25- Layers > Merge All
26- Selections > Select All
27- Image -> Add borders > Symmetric > 50 pixels color 2
Selections > Invert
Selections > modify > contract : 2 pixels
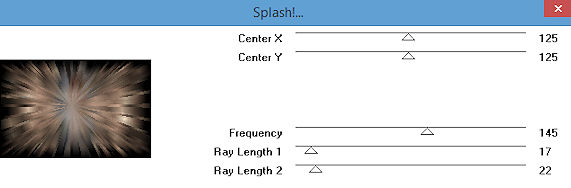
28- Plugins > VM Natural / Splash !...
29- Plugins > AAA Frame > Foto Frame >
15/0/0/2/0/0/0/100
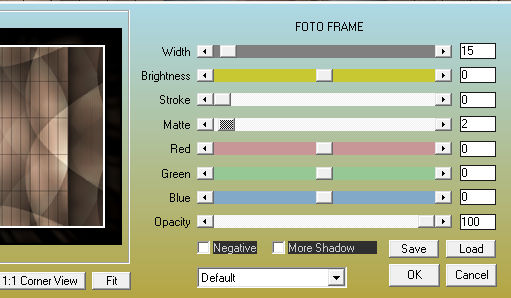
Selections > Invert
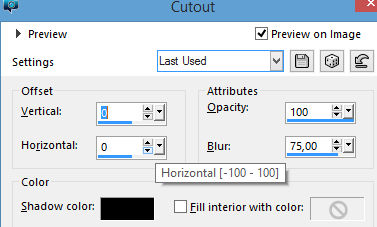
30- Effects > 3D Effects > Cutout > black
Selections -> Select None
31- Ative a ferramenta Zoom Tool clique na sua imagem
para aumentar o tamanho.
Selecione a borda branca com o Magic Wand Tool

32- Preencha com flood fill tool esta seleção com a cor
1.
33- Plugin > Graphic Plus > Cross Shadow > (Default)
0/0/0/0/0/0/128/128
Selections > Select None
34- Copy > paste as new layer > 58_homme_Animabelle
Image > resize > 80% ( all layers desmarcado)
Posicione ao lado direito como resultado final.
Drop Shadow do item anterior
35- Copy > paste as new layer > Paco-Animabelle
(perfume)
Posicione ao lado esquerdo como resultado final.
Drop Shadow do item anterior
36- Instalar a Font (Orial.ttf)
Activar o Text Tool > size : 60 pixels
FG=color 2 > BG=color 1

Layers Palette > Convert to Raster Layer
* posicione como preferir
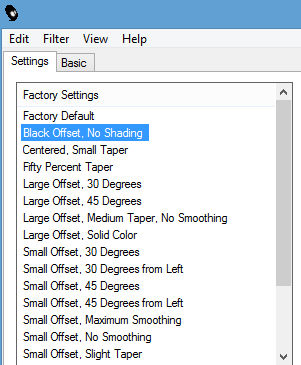
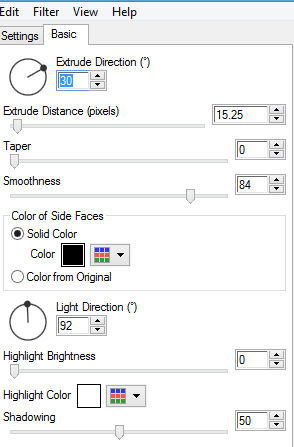
37- Plugins > Alien Skin Eye Candy 5 Impact > Extrude
Escolha > Black Offset, No Shading na tabela Settings
*Você encontrará um tube de texto pronto para usar no
material fornecido
Use uma sombra clara se desejar
38- Layers > Merge All (flatten)
Selections > Select All
Image -> Add Borders > 10 pixels color 1
Selections > Invert
39- Plugins > Graphic Plus > Cross Shadow como
anteriormente.
Selections > Select None
40- Layers > Merge All
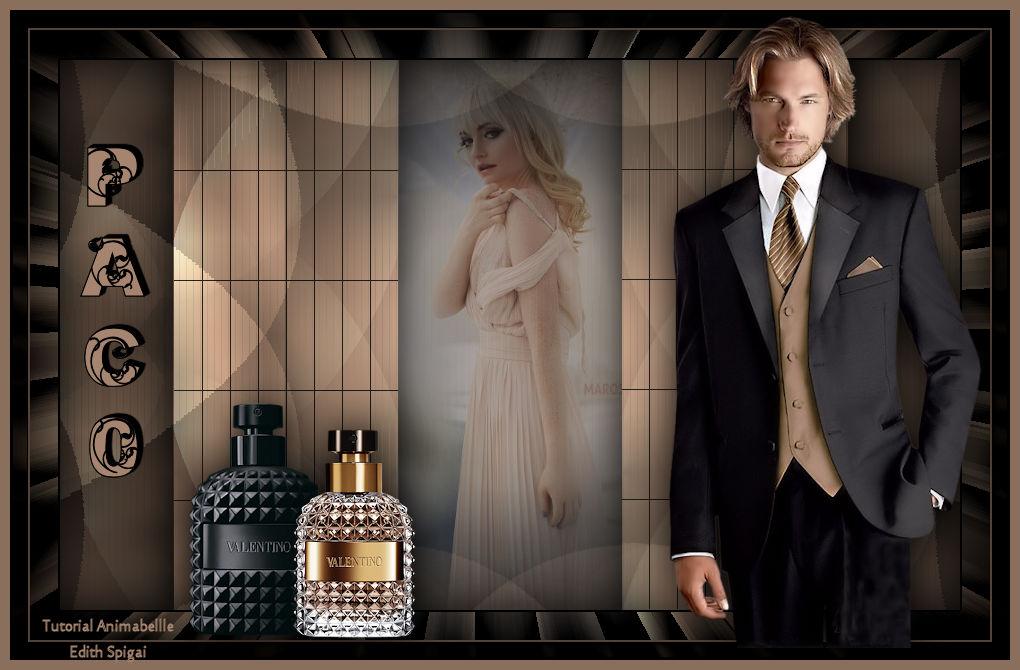
41- Assine e salve em jpeg.
** Traduzido em Português em São Paulo_Brasil_22/11/2016
por Edith Spigai **

Créditos:
Tube: LB Tubes
|
Nena Silva
 |
|
|
| |
|
|
| |
|
|
 |