|

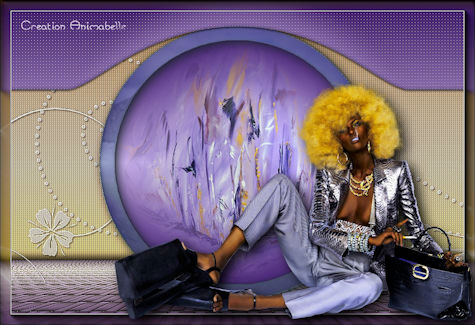
**BELLA**
(EdithSpigai)
MATERIAL
-Efeitos do PSP_2018
Plugin Carolaine and Sensibility
Plugin > FM Tiles Tool
Plugin MuRa's Meister
Plugin Alien Skin Candy 5: Impact
Plugin Nik Software
Plugin AAA Frames
-Tube
-Misted
-Mask
ROTEIRO
1- Abrir uma imagem de 950 x 650 preencher com gradiente
linear formado por duas cores:
1° Plano = (#3c1769) - 2° Plano = (#d6bff1)
Angle=0 - Repeat=1
2- Layers > Duplicate
3- Selections > Load/Save Selection > Load Selection
From Disk > Bella_EdithS
Se necessário: Selections > Invert
4- Layers > Promote Selection to Layers
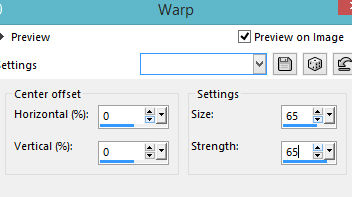
5- Effects > Distortion Effects > Warp
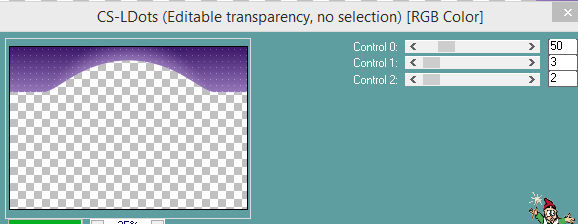
6- Plugin Carolaine and Sensibility > CS_LDots 50/3/2
7- Plugin > FM Tiles Tool > Blend Emboss
8- Adjust > Sharpen
9- Plugin Alien Skin Candy 5: Impact > Glass > Clear
10- Ative a Copy of raster 1 > Select > All e past into
selection
em misted de sua escolha. Select > None
11- Effects > Geometric Effects > Circle > transparent
12- Image > Resize > 85%
13-Com o magic wand selecione o circulo > Selections >
Invert
14- Selections > Modify > Select Selection Borders > 30
> Inside > Anti-alias marcado
15- Plugin Alien Skin Candy 5: Impact > Glass > Blue
Flattened
Select > None
16- Effects > Drop Shadow > 5/5/100/30
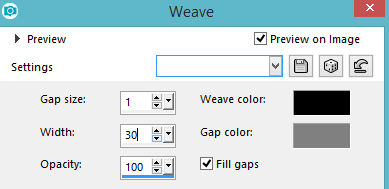
17- Ative a raster 1 > Effects > Texture Effects > Weave
18- Plugin MuRa's Meister > Perspective Tiling >
80/0/0/20/0/0/100/255
19- Plugin > FM Tiles Tool > Blend Emboss
20- Effects > Drop Shadow > -8/-8/80/20
21- Nova Layer > Layers > Arrange > Send to Bottom
Preencher com uma cor sólida em contraste com as cores
do seu trabalho.
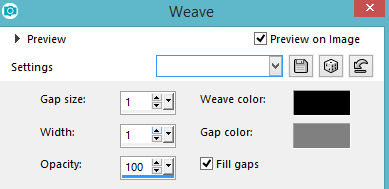
22- Effects > Texture Effects > Weave
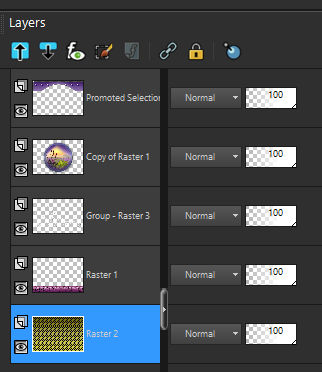
23- Nova Layers preencher com a cor #edebeb
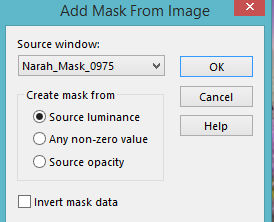
24- Layers > New Mask layer > From Image >
Narah_Mask_0975
25- Layers > Merge Group
26- Effects > Image Effects > OffSet > 0/85 - Custom e
Transparente marcados.
27- Effects > Edge Effects > Enhance More
28- Effects > Drop Shadow > 2/2/50/2,00
29- Ative a Layer Raster 2 e aplique o Plugin > Plugin
Nik Software > Color Efex 3.0 > Bi_ColorFilters
30- Ative a Layer Raster 1 e aplique o Plugin > Plugin
Nik Software > Color Efex 3.0 > Bi_ColorFilters
31- Aplique o seus tubes, usando drop shadow a gosto.
32- Layers > Merge Visible
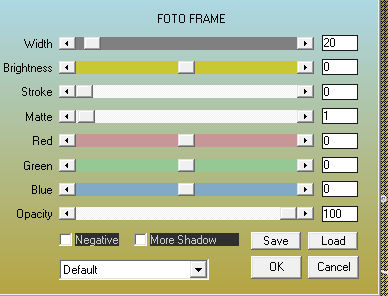
33- Plugin AAA Frames > Foto Frame
34- Plugim AAA Filters > Custom > Sharp (ou como
preferir...)
35- Assine e salve em jpeg.
** Tutorial Elaborado em São Paulo_Brasil_18/09/2017 por
Edith Spigai **
CRÉDITOS:
Tube: LB Tubes
Misted: By anna.br
Tutorial: Edith Spigai
|
Animabelle
 |
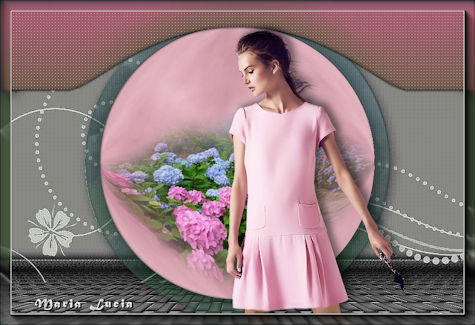
Maria Lucia
 |
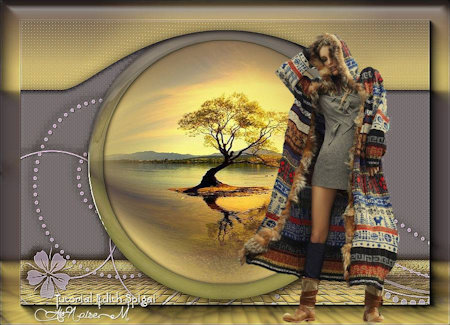
Naise
 |
|
Terna Katalin
 |
Beth
 |
Marylene

|
|
Sweety
 |
Andrea
 |
Inge_Lore
 |
| |
|
|

|