|
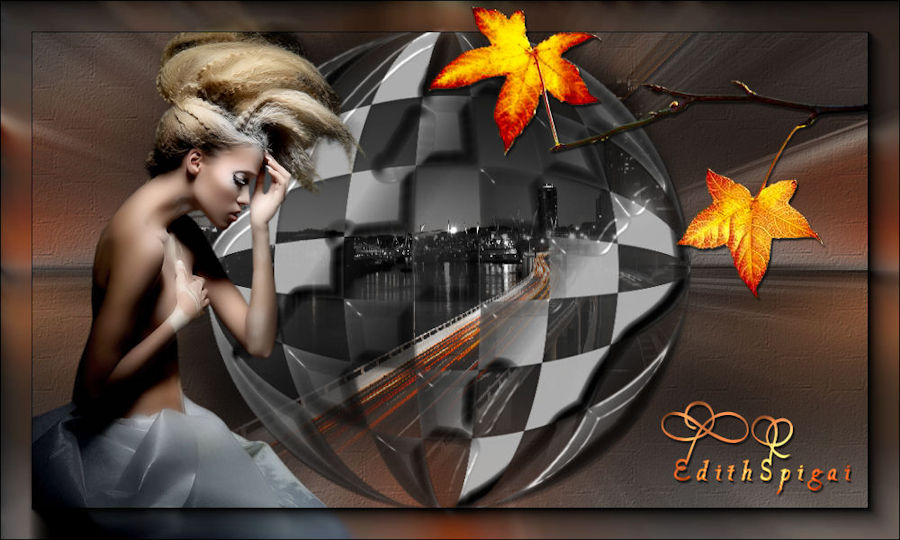
**TOP
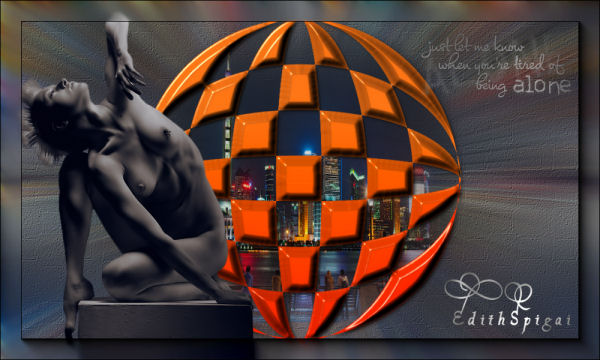
NIGTH IN CITY**
MATERIAL

- Efeitos
do Psp_9
- Plugin FM Tile Tools
- Plugin Layout Tools (Aqui)
Eye Candy 3.1 > Inner Bevel
Plugin Transparency
- Tubes
- Um Misted
ROTEIRO
1. Escolha
duas cores do seu Misted e forme um gradiente:
Linear / Angle: 0 / Repeats: 0 / invert: marcado
Usei: F ># 0d2051
B > # b0bdde
2. Abra uma imagem 1000X600px e pinte com o gradiente.
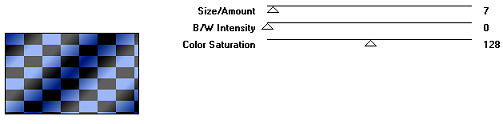
3- Plugin Layout Tools > B/W v Color Tiling 7/0/128
4- Plugin
Transparency > Eliminate Black
5- Effects > Geometric Effects > Circle (Transparent)
6- Effects > Drop Shadow > 4/4/80/8,00
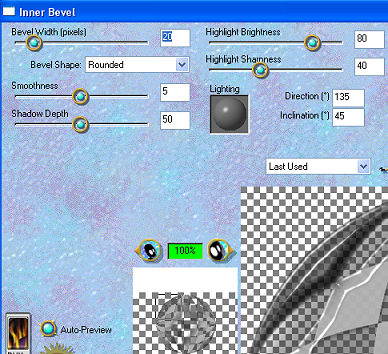
7- Eye Candy 3.1 > Inner Bevel
8- Image >
Rezise > 90%
9- Adjust > Hue and Saturation > Colorize 255/0
(opcional)
10- Aplique o Misted e posicione dentro do circulo,
apague os excessos
com a ferramenta eraser.
11- New Layers > Repita o passo 1 > Selections > Select
All
12- Edit Copy no Misted > Paste Into Selection > Select
None.
13- Effects > Image Effects > Seamless Tiling > Side by
Side
em seguida repita o efeito mudando para Default.
14- Adjust > Blur > Radial Blur: Zoom - 60/0/0/10
Ellipticasl desmarcado.
15- Plugin FM Tile Tools > Blend Emboss.
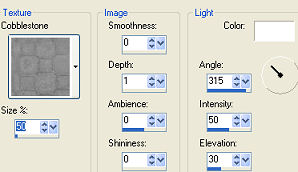
16- Effects > Texture Effects > Texture:
17- Repita
o passo 15
18- Insira os tubes harmoniosamente, use Drop Shandow ao
seu gosto.
19- Layers > Merge Visible.
20- Adjust > Brightness and Contrast > brightness/contrast
> 15
21- AAA Frames > Foto Frame > 35/0/0/0/0/0/0/100
22- Layers > Merge > Merge All
23- Assine e salve em jpeg.
** Tutorial criado em 11/09/2012 por Edith Spigai **
Créditos:
Misted: LB Tubes
Tubes: Crealine - Mou
- Ana Ridzi
Art e Formatação: EdithSpigai

|